When handling sensitive data, data security is a top priority. One of the many steps to ensure that data remains safe and secure via our cloud-based Data Protection platform is by conducting client test environments. Whether you are a new or existing TokenEx client, it’s essential to understand what a test environment is, why it’s important, and how to use the test environment. Our solution architects and support teams work hard to ensure that these tests accurately represent the environment used in the go-live production phase.
What Is a Test Environment?
A test environment is a server designed to run test cases. The test environment includes setting up a server to run tests, establish network configurations, and create login credentials for clients. Specifically, the main goal is to create identical environments for testing a product, such as network tokenization. Indeed, test environments are an essential tool for determining how effective the products are and troubleshooting them before the go-live phase.
Why Are Test Environments Important?
Test environments are an essential step of the client implementation process as they provide accurate feedback regarding the quality and behavior of a product under test. Indeed, these tests create a safe environment to determine whether the code, features, and overall user experience function correctly and meet a client’s needs. It’s better to discover any issues in this phase rather than discover them later in the production stage.
Additionally, a test environment can produce accurate test results that confirm that a product or service is effective, running properly, and free of errors. This is only possible by creating a test scenario that is identical to the production environment.
How Do You Use the TokenEx Client Test Environment?
Now that you know what a test environment is and why it’s important, let’s dive into everything you need to know about using the TokenEx client test environment. The client test portal is relatively simple to set up with just a few steps. You will use this portal to monitor and manage your TokenEx vault, as well as secure communication with the TokenEx client services team.
Set Up Your Portal Login Credentials
After your client portal account is created, you will receive an email asking you to log in to the test environment via your company email.
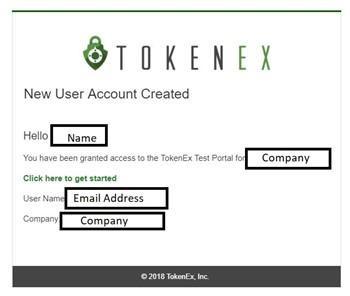
Step 1: Email
You will receive an initial email stating that your client account has been created. This email will include a link that leads you to the portal password reset page.
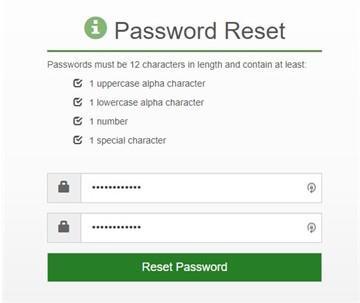
Step 2: Password Reset
Once you are on the password reset page, you will need to set up a password that contains a minimum of 12 characters and contains the following:
One uppercase alpha character
One lowercase alpha character
One number
One special character
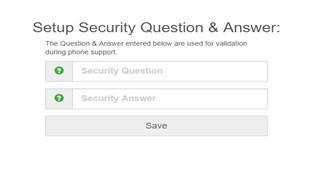
Step 3: Security Question
After your password is created, you can proceed to the security question process. TokenEx requires that you create a security question and corresponding answer. We will use this information to confirm your identity for phone support.
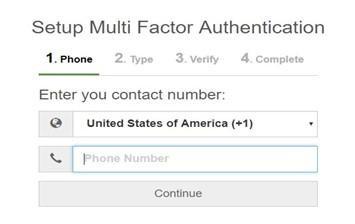
Step 4: Multi-Factor Authentication
When the security question has been created and answered, the next step is to complete the Multi-Factor Authentication process.
You will begin by selecting your country and entering your mobile phone number.
You can receive your verification code via an SMS code or phone call. Once you receive the one-time code, you will enter it in the appropriate field.
After the valid code has been entered, a QR code will display on your screen, allowing Authy to be downloaded and installed on your device.
Every time you log in to the portal, you will use a 2FA code from Authy to ensure that only authorized users gain access to the test environment.
Client Portal Login
Now that your account is successfully created, it’s time to log in to your portal. Follow these steps below to navigate through the test environment.
Step 1: Log in to the Client Portal
Log in to the portal at https://test-my.tokenex.com, where you will find your account dashboard/homepage. The portal dashboard includes various features in one central location, making it easy to manage your test environment. For example, the dashboard consists of your:
Token count (this is only viewable for vaulted clients, which updates once daily around midnight CST)
Open support tickets
Error count from the past 24 hours
Step 2: Manage Users
Do you need to create additional user roles for your team? If so, you can easily do this within the portal dashboard.
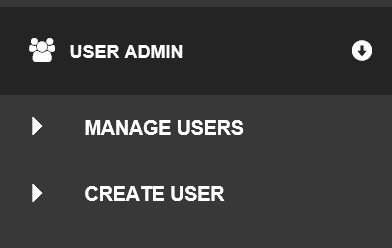
Navigate to the “User Admin” link in the menu.
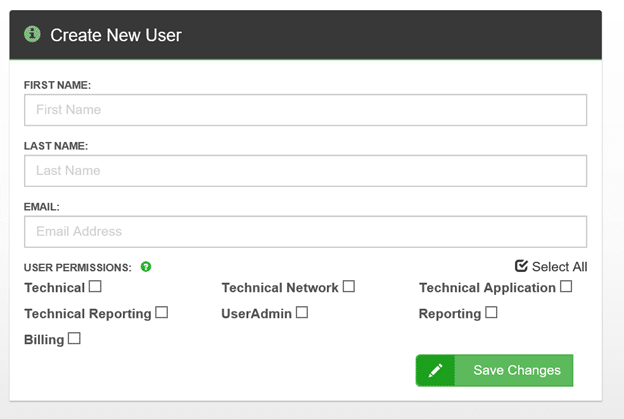
Select the “Create User” option.
Every role is key to controlling the permissions and access to sensitive data.
Users can have multiple roles to ensure they have the appropriate access to all necessary information.
After entering each user’s name and email, select their user role.
The new user will receive an email stating they have a login to the TokenEx client portal.
TokenEx Portal User Roles
User Admin – provides access to add, edit, and delete users from your company.
Technical – provides base access to the technical areas of the portal environment. This role needs to request any technical permissions and access to support tickets.
Technical Network – provides access to view, modify, or request changes to your IP whitelist(s).
Technical Application – provides access to view API keys and open tickets requesting changes to, or additional, API keys.
Technical Reporting – provides access to usage reports.
Step 3: API Settings
On the dashboard navigation menu, you will access the API key settings. Remember that these keys are harmful to tokenization, detokenization, and more. By default, sandboxes are configured with full access to all of our API products (minus additional charge products, such as proxy tokenization, 3-D Secure, and network tokenization). When clients transition to the production environments, their API key layouts and products are fully customizable.
To get started:
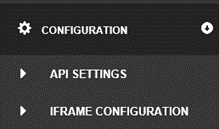
Select “Configuration” and then API Settings.
You will see your TokenEx Vault ID and Vault name.
You can edit this vault name.
The number of API keys varies based on what you have requested.
View your API keys by clicking on the eye symbol on the far right.
You can see which methods are used by clicking on the plus symbol.
Access your v3 iFrame API key by selecting IFRAME CONFIGURATION under configuration.
Step 4: IP Whitelist
Since you are in the test portal, TokenEx does not require you to whitelist your IP address. However, whitelisting your IP address is recommended in the production environment for security purposes.
In the “Configuration” menu, select the IP Whitelist link.
The “ANY” refers to accessing the portal and submitting API requests from any API address.
You can add additional IPs to the whitelist by entering the IP address and selecting Submit.
After the IP is added, API requests cannot be made from a different IP address unless you add ANY as an option again and remove the IP you entered.
Step 5: Client Portal Support
The TokenEx support team offers 24/7 client support available in your client portal account. You will see Support on the left navigation menu. Indeed, our portal provides secure communication that can be used to reach out for assistance.
Navigate to the Support link via the menu.
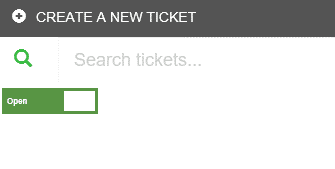
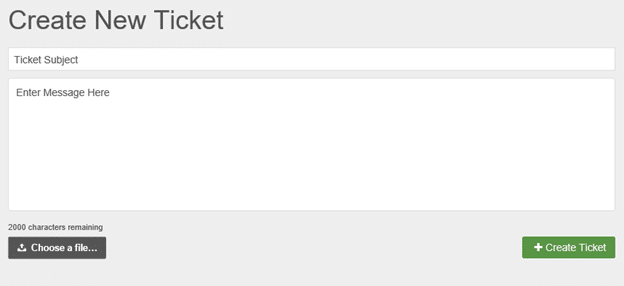
You will see a menu to create and search for tickets.
Select the “Create A New Ticket” option.
Enter a subject and your message to our support team.
You can attach documentation as needed, such as a screenshot.
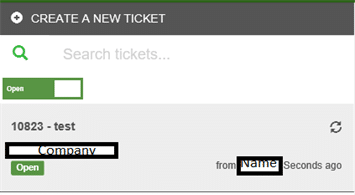
Once the ticket is created, it will appear in the Support Menu.
You will receive an email stating that the new ticket has been created and when you will receive a reply from the TokenEx support team.
Any closed support tickets can be viewed by sliding the toggle button from open to closed.
These tickets can be accessed and act as a reference guide for future use.
Authy App Phone Setup
As clients, it’s expected that you will need to either replace or reset your mobile device linked to the Authy app.
To get started:
Download the Authy app to your phone.
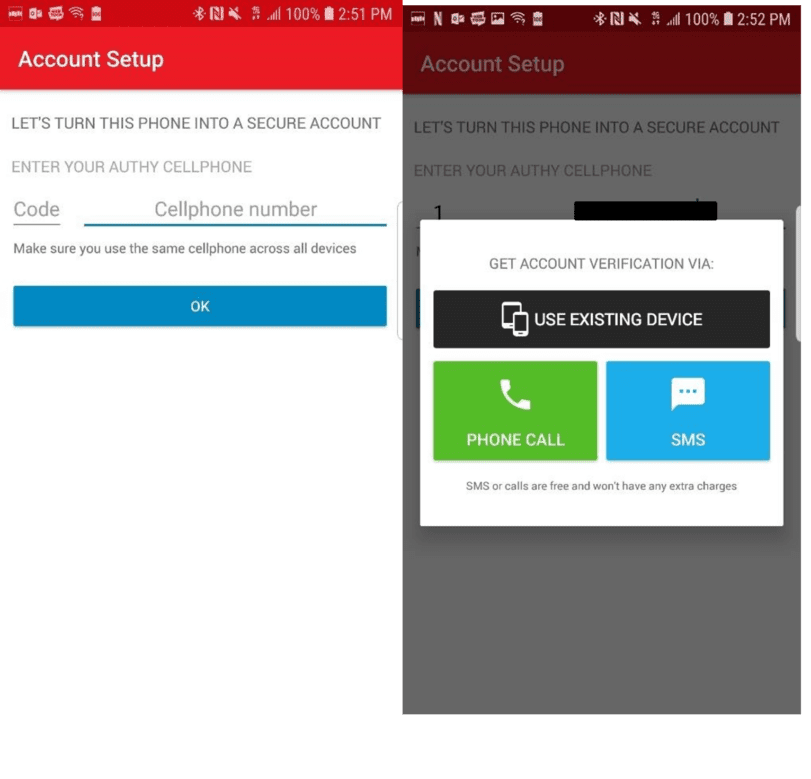
After it’s installed, the app will prompt you to enter a phone number.
Once the number is entered, the app will ask you to select between an SMS message or phone call to receive a verification code.
When the code is received, quickly enter this code, which will link the Authy account to your TokenEx client test environment. This code will reset every 20 seconds.
Create Your Test Environment Today
As you can see, the setup process for using your client portal test environment is pretty straightforward. Since we take data security very seriously, there are multiple security layers in place to prevent unauthorized access and use of your company’s sensitive data. Additionally, our 24/7 expert support team is dedicated to helping answer questions, solve problems, and ensure that you have a positive user experience.
Are you ready to use your client test environment?
